On the road to Industry 4.0, measuring and inspection technology is increasingly being used as a conrol tool in manufacturing. As a part of this new role, however, the technology needs to capture quality data more flexibly and quickly at different sites: in the measuring room, at-line and in-line. And this technology must merge and evaluate this data and make it available to persons and/or machines for control input.
Production technology and information technology are fusing with the goal of increasing production efficiency. For the past several years, ZEISS has been focusing sharply on the production of the future, especially on the impact of these developments on measuring technology. Measuring and inspection technology will be a control tool in the smart factory, which will only be self-organizing when quality data for the workpieces is constantly captured parallel to production. Industrial measuring and inspection technology will construct the interface between the virtual world, where production processes are automatically planned and simulated, and the real world, where not everything happens as planned. Only by using measuring and inspection technology to acquire feedback from the real world of production is it possible to prevent rejects. This is the only way for both people and machines to recognize, for example, that, in spite of preventive maintenance, a machine tool has been worn down earlier than planned or that the quality of the machined materials is subject to unexpected fluctuations. Measuring and inspection technology is not only used for determining quality. It must also reduce the data obtained to what is essential, evaluate it and make it available to those parts of the company which need it. When it comes to
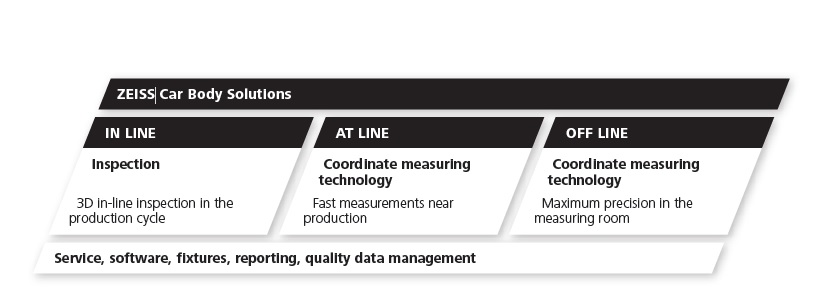
measuring technology, companies need to take different approaches simultaneously. Highly accurate off-line measuring technologies in the measuring room, in-line as well as at-line technologies in the production
environment will share measuring tasks in the future:

In-line
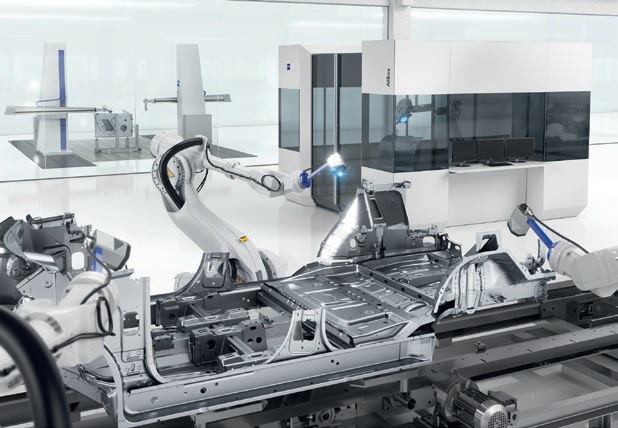
While in the past measuring technology operated independently of the production cycle, the importance of in-line inspection in production is currently growing. 100% inspection integrated into production is already being employed, e.g. in car body construction. Without this level of inspection, monitoring, or even regulation of processes, the factory of tomorrow is not possible. To prevent errors before they occur, inspection data is evaluated in real time and continuously visualized as trends in the data sequences. If statistical abnormalities appear, then it is possible to quickly react to the first signs of malfunction, e.g. before a cutting tool is so completely worn down that it results in rejects. This sort of monitoring requires relatively high precision and image resolution from the measuring and inspection technology, even under production conditions such as fluctuating temperatures or levels of dust – and
this must all happen at a speed suitable for the production line. Currently, this is achieved using optical sensors on robots which, for example, automatically inspect car body components.
At-line
At-line measuring systems are increasingly being used in addition to the in-line measuring systems which, with 100% irocess inspection of the production technology being employed. With these systems, the entire surface of a part can be digitized and then analyzed flexibly with measuring technology. With these technologies, the production area at these companies has a measuring assist system which immediately delivers measuring results to the workers at-line, thereby saving a detour to the measuring room. For example: by using random sampling, these technologies quickly and easily provide staff in car body construction with an overview of how an entire part is being developed in terms of its form and position tolerances or what the freeform surface actually looks like as compared to its target state in the CAD model. At-line systems of this sort reduce time and effort in the measuring room, deliver data to the shop floor about the plan-actual geometry comparison and expand the in-line measuring technology used for process inspection with at-line measuring technology.
Off-line in the measuring room
Although more quality data are being captured in-line or at-line, measurements in the measuring room are still a part of day-to-day operations at the factory of tomorrow. With their high precision, which will not be possible in
either the production cycle or the production environment for the foreseeable future, these will remain the benchmark to aim for. The question always arises if comprehensive analyses and/ or highly accurate measurements are,
for example, required to solve a quality problem whose cause is unknown, to improve a design or to ensure the quality of highly-sensitive products. But time does not stand still in the measuring room, either. With more and more multi-sensor measuring machines, the measuring process is becoming increasingly flexible and fast. In the future, metrology providers will have to make all three measuring technologies available and develop them further if they
want to offer their customers a complete solution: in-line, at-line and in the measuring room. And along with their customers, they will have to think about how they can meaningfully combine these three approaches. Measuring and inspection technology becomes more efficient when companies use the right technology, at the right amount and for the right purpose.
Measuring data 4.0
Not only will data capture change in the age of Industry 4.0, but data processing will as well: decentralized intelligent systems will pre-process data in the sensor and reduce it to the most important data before sending it onward. This is how companies can minimize transfer time and prevent the mountains of data from becoming immeasurable. And one thing will be decisive in the future: on the basis of measuring data, software solutions for production will automatically give instructions. You can already observe the first signs of this happening in factories today. For example: numerous automobile manufacturers and suppliers are merging their process and quality information using the ZEISS PiWeb, a central software platform. These days, it is still the employee who uses, for example, the evaluations to decide how he should adjust the welding robot in response to deviations in the measured values. But that will certainly change. In the future, the software platform will initiate these adjustments independently. If, for example, measuring data is heading in a particular direction, the system instructs the robot to change the welding parameters like the welding current or the electrode force as stipulated by the intelligent software module. This is entirely in line with self-regulating production in the factory of tomorrow.


