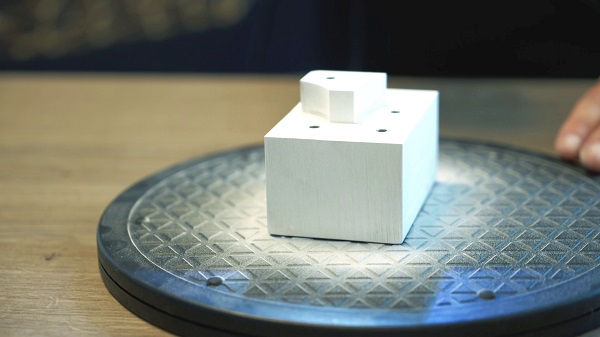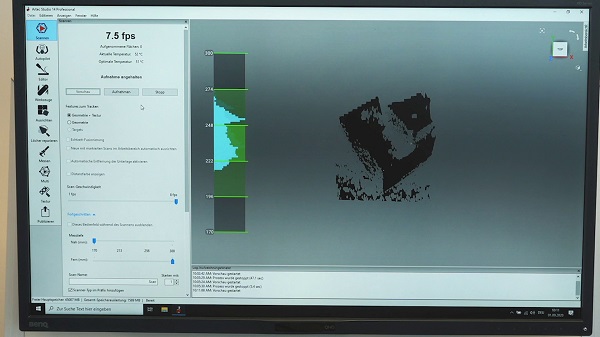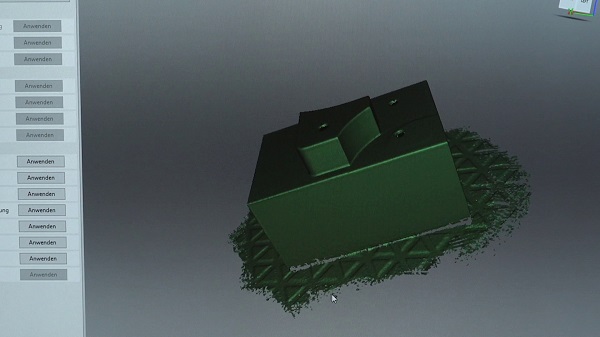
The shiny surfaces of the metal block can barely be captured by a scanner.
Precise milling processes require precise positioning of the workpieces on the machine table. The machine tool’s tactile measuring sensors determine the position and location of the parts to be milled, and the milling programs are set accordingly.
However, the integrated measuring sensors have only limited suitability for castings and 3D-printed metal parts. They cannot fully detect the position of the freeform shapes in the 3D space. The large shape and geometry tolerances (+/-0.3mm or more depending on the workpiece size) of castings and 3D-printed parts require detailed optical measurements. These are either performed with a hand-held scanner directly in the machine tool, or on a removable zero point-mounting system plate outside of the machine. Using the data obtained, fine-tuning of the milling program to match the workpiece position takes place.
The problem: Material costs for 3D-printed parts are high, so the machining allowances are kept small. The milling process has to be extremely precise. Capturing the freeform surfaces, however, is more complicated than with standard milled parts. Added to this is the fact that castings and 3D-printed parts are frequently shiny, and in some cases have deep recesses. These surfaces cannot be fully captured by many scanners. Here, it is helpful to mat the surfaces with a scanning spray, for example from AESUB.
With the spray, shiny metal surfaces are matted in a few seconds and can be measured immediately. The scanner can fully capture the matted surfaces, leading to faster availability of reliable workpiece data. In particular with small production runs and prototype production/first article inspection, scanning sprays help to speed up measuring, and thereby the machining processes, and avoid wastage.
Recommended here are sublimating scanning sprays which completely vanish after a short time and thus remove the need for subsequent cleaning of the workpiece and machine. AESUB currently offers three sprays with different sublimation times.

Without Scanningspray: The shiny surfaces of the metal block cannot be shown.

With Scanningspray: Metal block was sprayed with AESUB blue. All the surface are now easily visible.
Advantages of the scanning sprays
Measure shiny and reflective surfaces faster; accelerate the machining process
Workpieces are matted within a few seconds, thereby generating high contrast values, so that the measuring process can start immediately.
Less scrap
Thanks to the improved data capture, scrap is reduced or prevented
3. Ideal for inline measurement
Workpieces can be sprayed directly in the machine. Machining can be swiftly resumed.
4. Spray sublimates, no follow-up cleaning
The machine tool and electronics are not damaged, because the spray fully sublimates. Workpieces do not have to be cleaned to remove the spray after measurement. With channels or deep drilled holes, in particular, users are spared labour-intensive cleaning.
5. Pigment-free
The sublimating AESUB sprays are free from pigments. They do not contain titanium dioxide, which is hazardous to health.
Not all sprays are the same
There are now a large number of different scanning sprays available which vary in terms of their layer thickness, sublimation time, ingredients and touchability. The most important features are their uniform application and ability to sublimate.
Even sprayed layer
To achieve a homogeneous sprayed layer, the sprays have to be very fine and be applied without any drops forming. With inferior sprays, reliable measurement results are impossible owing to the uneven application. If the sprays are too liquid, then drops and puddles form, whereas if they are too viscous, then the material is applied too thickly. As a result, the measurement results become distorted.
The scanning sprays from AESUB can be applied very finely and evenly. Depending on the AESUB spray variant, the layer thickness is between 0.5 and 15 µm.
Sublimating sprays protect people and machines
Conventional sprays adhere stubbornly to workpieces and neighbouring areas. Non-sublimating sprays cannot be used for measurements in the machine. The cleaning of the machine and workpiece would be – if possible at all – extremely time-consuming. For applications on and in the machine, scanning sprays must be capable of sublimating.
The spray variants from AESUB have different sublimation times. Which of them is used depends on the workpiece size or required scanning time. The sublimation times are between an hour and twelve hours.
The ingredients also play an important part when it comes to scanning spray use. Some sprays contain pigments and titanium dioxide, which is harmful to health. To protect employees, therefore, pigment-free sprays such as those from AESUB ought to be used.
With scanning sprays, reliable measurements results are available more quickly. Machining programs can be adapted faster and thereby the production processes significantly accelerated. Handling is straightforward. The AESUB sprays can be applied using spray cans or with the aid of a spray gun. Within just a few hours, the sprayed layer has disappeared.


