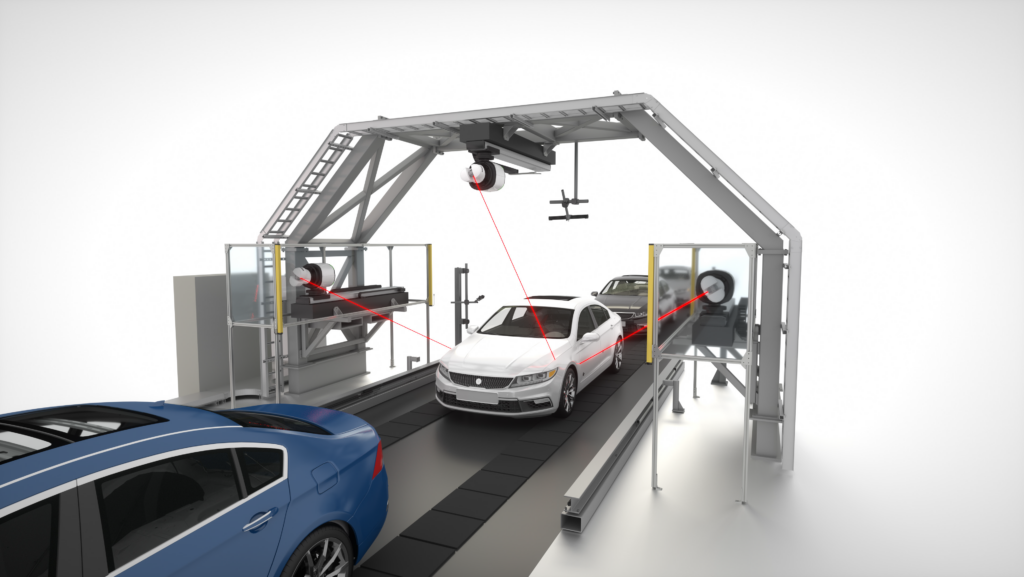
Building on the recent successful launch by Nikon Metrology of the APDIS Laser Radar, which is helping to drive a paradigm shift in automotive body shop measurement and quality control, the company announces the launch of its APDIS Gap & Flush System. It introduces a unique, innovative, fully automated method to measure gap and flush on a moving production line for finished vehicle on wheels. This is achieved without the need for robots and the complexity in programming and safety that they inherently require.
Consistency of the gap between adjacent panels and closures, especially the doors, as well as any difference in level giving panels the appearance of not being flush with one another, are major issues on a forecourt influencing a person’s purchasing decision. Additionally, when a vehicle is being driven, such variations can contribute to squeaking, rattling, wind noise and leaks. All these factors affect the perception not only of the product but of the brand itself, which means that controlling them is vital to a company’s reputation.
Far-reaching improvements
The APDIS Laser Radar is the latest generation of the product, offering higher speed and higher quality measurements. The APDIS Gap & Flush System utilises the technology to provide fully automated, inherently safe measurements on a moving production line, delivering reliable data from all around a vehicle, regardless of colour or finish.
Previous gap and flush measurements have either relied on manual tools used by highly skilled workers, or complicated robot installations with inherent issues regarding safety and short stand-off. The APDIS Gap & Flush System provides part and operator safety due to a large stand-off and in-built safety enclosures that do not impact the production line conveyor.
APDIS Gap & Flush
Developed in conjunction with VRSI, which has many years of experience with successful Laser Radar installations in major automotive OEMs, Nikon’s APDIS Gap & Flush is an evolution in fully automated, high-speed, vehicle-on-wheels inspection. With the ability to track and measure at conveyor speeds up to 140mm/s, a large internal measurement volume, and utilising three Laser Radars for all-round coverage, the system can be deployed to measure a wide range of vehicles from small hatchbacks to large SUVs and trucks and everything in between.
The vehicle is tracked directly using linear sensors, meaning no conveyor interface is required. Position is determined prior to the vehicle entering the system by a set of 3D sensors that automatically account for variations in position on the conveyor. Once the vehicle is inside the system, the three Laser Radars move synchronously along linear rails, with the long range allowing measurement of gaps and flushes at specific programmed locations. By continuously moving back and forth along the rails as the vehicle passes through, data is acquired all along the vehicle with up to 170 measurement locations possible.
Key benefits
In conclusion, the new APDIS Gap & Flush System provides fast measurement and good vehicle coverage. Three Laser Radars give all-round visibility, so quality control is greatly improved. Inherent vehicle and operator safety are provided by the large stand-off of the APDIS Laser Radar, greater than 0.5m, while the use of linear rails means the system never approaches the vehicle and operators are protected by light curtains and floor scanners. The results are no damage and zero-line stoppages.
High quality measurements are another defining benefit. Depending on factory condition, dynamic repeatability of better than 0.150mm on flush and 0.300mm on gaps delivers reliable, precise measurements for the user, Furthermore, complexity is reduced, as independent vehicle tracking and linear rail movement allow simplified part programming, with much of the setup being performed off-line prior to installation. No complex robot programming is required, reducing installation and modification times.
Source: Nikon Metrology NV


